1. Introduction to Scratch
1.1. Interface
1.2. Glide
Move sprite smoothly from one point to another
Choose your sprite from the costumes or paint your own sprite.
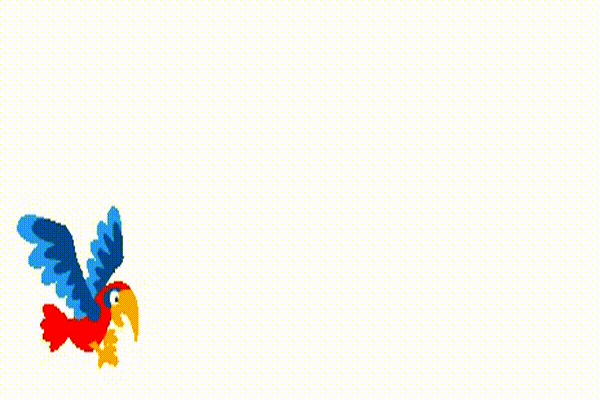
In this lesson we chose a parrot, we will make it fly!
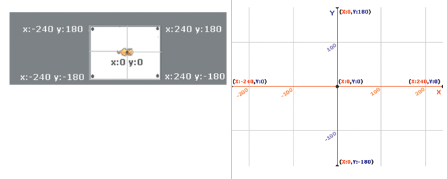
First, define your sprite (x,y) position:
- Drag your sprite to the position (x,y) you want it to start from.
- Define the position (x,y) from the box on top of the script.
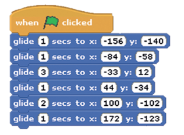
Second, from Motion:
drag the block

- The number of seconds control the speed.
- The X and Y define the position to where the sprite will move.
Now, try this code:
Click the Green flag to start and the red circle to stop!

Tip
How to identify the (x,y)?
The “X position” value determines the horizontal location of the sprite
The “Y position” value determines the vertical location or height.
(0, 0) is considered the center of the screen
Note
Try it: How can you make the sprite go slower or faster?
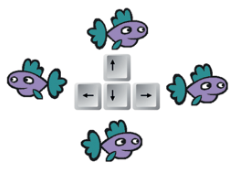
1.3. Key Moves
Use the arrow key to move your sprite
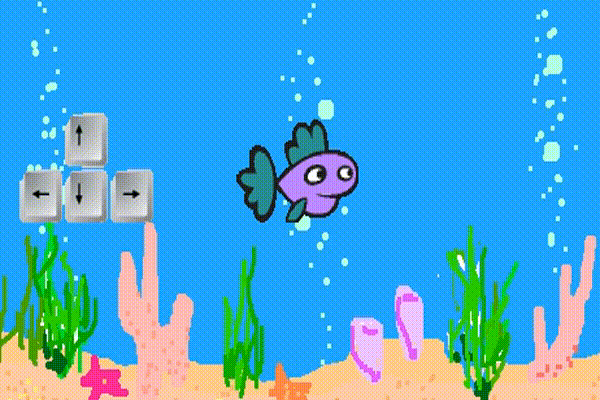
Choose your sprite from the costumes or paint your own sprite.
In this card we chose a fish, we will make it swim in all directions!
We will add a script to make the fish move up, down, right, and left with the arrow keys, using the ‘point in direction’ block and the “move 10 steps” block.
First, define your sprite (x,y) position:
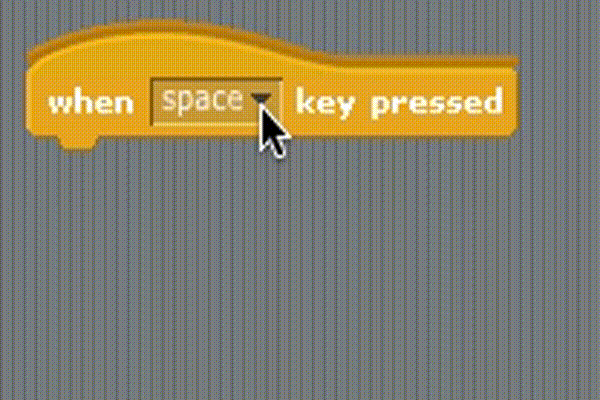
From Control choose the following block and specify the arrow you want to use
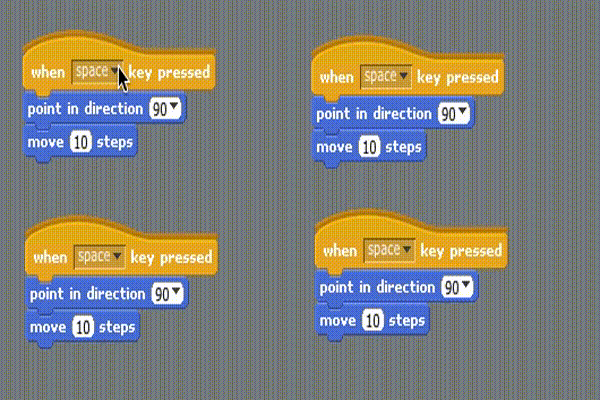
Second, from Motion:
Choose block “point in direction” and specify to which direction you want your sprite to move.

Choose the block “move 10 steps” to specify the number of steps.
Try this code to make the fish swim, control it with the key arrows:
Tip
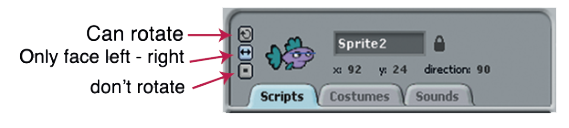
Click the Rotation Style buttons to control how the costume appears as the sprite changes its direction:
Rotate: The costume rotates as the sprite changes direction.
Left-right flip: The costume faces either left or right.
No-rotate: The costume never rotates (even as the sprite changes direction).
Note
Try it: Add underwater background, and add more fish sprites that swim randomly and forever!
1.4. Maze
Move object through a maze using key moves and sensing blocks
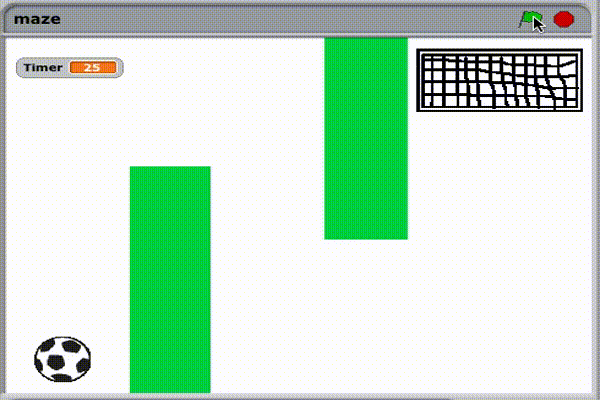
We painted a green maze and we chose a soccer ball and a goal as sprites!
First, paint your maze:
Click on Stage and from the tabs on the script area click on Background in the middle pane.
Click on paint to draw your maze.
The paint editor will pop up.

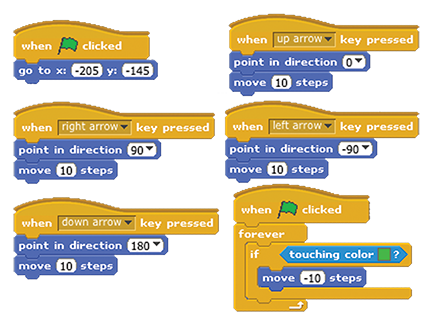
Second, choose the sprite that will move, in this example it’s a soccer ball:
From Control choose the green flag control
Define the position (x,y) you want it to start from.
From Control use the the arrow control, see Key Moves
From Control choose the “forever block” and insert “if block” (if the condition is true, it runs the blocks inside), insert the block “move 10 steps” and from Sensing the condition “touching color?” so everytime the ball touches the green maze it will step back.
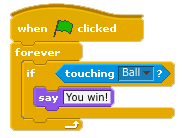
Third, choose the sprite that will be the end of the maze. In this card it will be the goal:
From Control choose the green flag control
From control choose the “forever block” and insert “if clock” (If the condition is true, runs the blocks inside), insert the block “say” and write “You win!” and from Sensing the condition block “touching” and choose “ball” (or sprite name) so when the ball reaches the goal a callout will pop up and say “You win!”.
Note
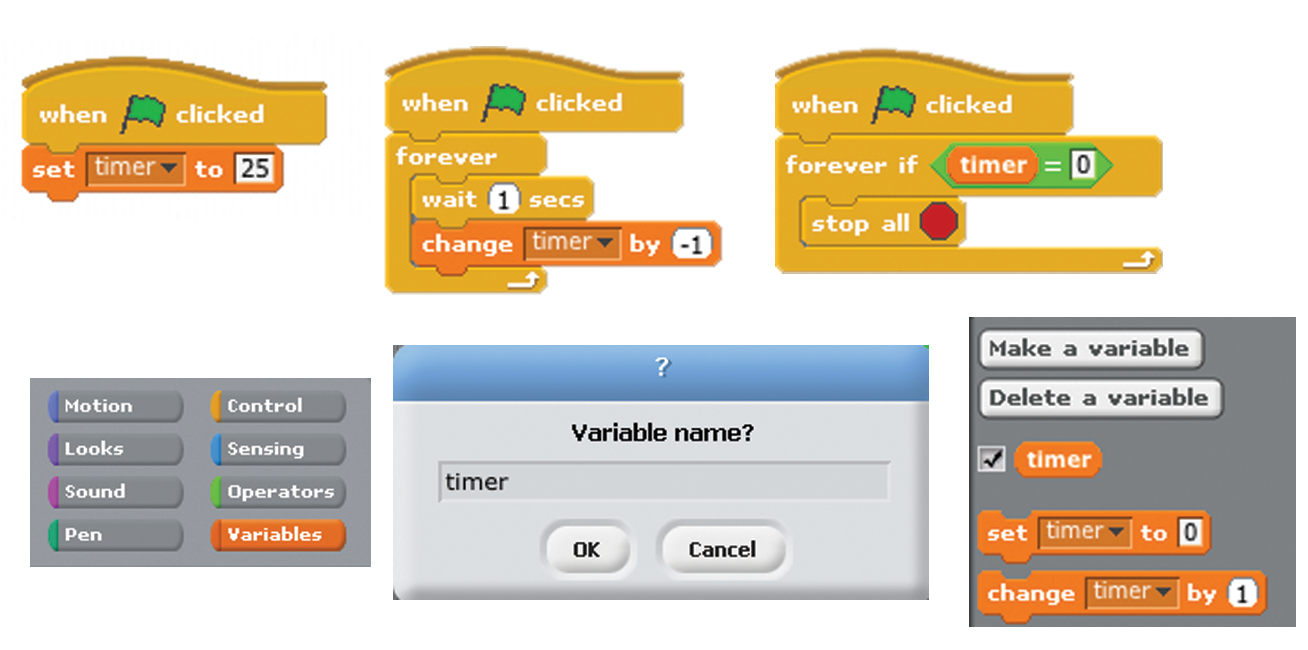
Try it: Add more obstacles and add timer!
Hint
To add timer to your game:
Click on Stage button
Choose Variables from Blocks palette.
Click on “Make a variable” then name it Timer
Try the code below.
1.5. Story
Let your sprites talk and make a story
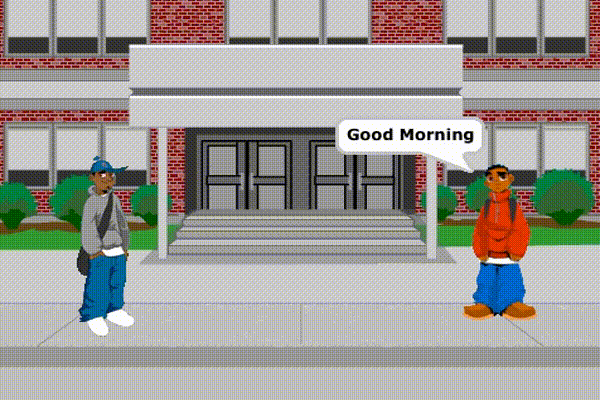
Choose your sprite from the costumes or paint your own sprite.
We will let two sprites talk to each other! It’s about two boys coming back to school on the first day after the summer vacation.
First, get a background for your story:
Click on Stage and from the tabs on the script area click on Background in the middle pane.
Click on Import to choose one from the library.
Or Click on paint to draw your own.
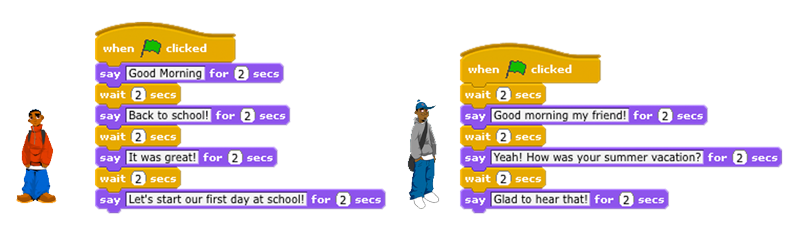
Second, try this code:
From Control choose the green flag control
From Looks choose “say Hello for 2 secs” block, write inside the box the text that you want your sprite to say.
From Control choose the block “wait 2 secs” specify the time you want the sprite to wait before saying the next text.
Note
Try it: Continue the story of the two students or write your own story:
- Change background
- Choose sprites
- Change costumes